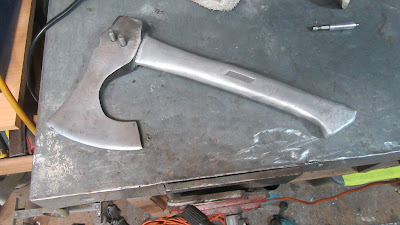
Turning A Cheap Axe into a Viking Style Axe
I just posted a new video where I took an old axe and turned it into a cool looking Viking axe style, I have used first time metal etching in this project, and sand casting to create the new solid aluminum handle. As always all the aluminum used is from recycled old parts, Feel free to check my YouTube video below with all the steps and don't forget to tap on like, subscribe or just leave a comment ;-).
The first step was to create the new Viking axe design, I used basic material's to create the shape such as WD40 metal can, duct tape roll and T-Pex pen pen to mark the lines. I have also removed the old handle easily by drilling the axe head.
Step 1: designing the Viking axe shape
Step 3: using and angle grinder cutting the shape of the Viking axe
Once the shape was cut with an angle grinder I did some sanding with a flap disc and sand paper
Step 5: creating the sand mold and casting the aluminum into a sand mould with the Viking axe head inside. The aluminum casting turned out very well just required some light cleanup ;-).
Step 6: To create extra support of the axe head to the new casted aluminum handle I used my bench drill, drilling two holes and welding x2 metal pins for extra strength, then cleaned the surface with angle grinder and you could never guess there are 2 pins welded
After the metal pins welding and cleanup on both sides
Step 7: I used metal etching with a 12V car battery charger, salt and lemon to create two words in (ancient Paleo (1200BC) Wiki) - one words refers to "Good" and the other word "Evil", I thought its symbolic as an axe can be used as a weapon in times of war and other times just for survival/camping to chop wood. I used electrical tape and Tipp-ex pen to create the words and shapes across the Viking axe head.
Metal etching with basic materials


